Turn Windows Server 2008 into an Excellent Workstation – Part I – Basics
December 8, 2008 - Reading time: 17 minutes
In a previous post, I mentioned how to get Windows Server 2008 for free (students only). For those of you who take advantage of that offer, rest assured that you can turn Server 2008 into an excellent workstation operation system. With a tiny bit of work, Server 2008 can look and act similar to Windows Vista.
Undoubtedly, someone is bound to ask, why on earth would you waste time turning Server 2008 into Vista when you can just use Vista?
It’s a good question, and I doubt I will answer it satisfactorily. Yes, Vista and Server 2008 share the same code base. If you already own Vista, you have no real need to switch to Server 2008. In my case, I do not own Vista, so this guide is geared more toward people like myself.
Another consideration is that Server 2008 installs with far fewer features and services enabled by default. Compared to default Vista, there is far less bloat. Sure, you can essentially turn it into Vista by enabling all the features, but you only have to enable what you need. I’ve been using Server 2008 as my main workstation for several month now, and I think it’s a surprisingly good OS, one that can suit most anyone’s need as a workstation.
Let’s get started. I assume you have already installed the OS. In my case, I’m using Server 2008 Standard 32-bit.
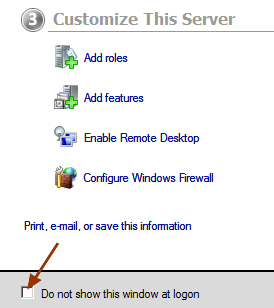
Disable Server Manager at Login
First things first, let’s disable the two windows that spawn at login. Check the box to disable the Initial Configuration Tasks at login.
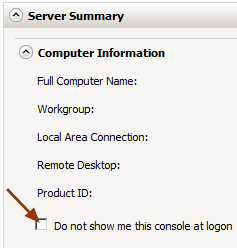
And then check the box to disable the Server Manager at login. You can always access it again from the Start menu.
Disable IE Enhanced Security Configuration
As with any Windows Server OS, Internet Explorer is locked down pretty tightly. Before you can download other software (such as drivers and Firefox), you will need to disable IE ESC. Go to Start -> Server Manager and then click Configure IE ESC.

Turn it OFF, at least for Administrators.
Grab the Latest Drivers
As with any new Windows installation, be sure to get the latest drivers for your hardware. Just visit the vendor’s website and download them. If the vendor does not offer a driver specific to Server 2008, try installing the latest Vista driver. Chances are very high that it will work.
For my Nvidia graphics card, the Vista drivers worked just fine. Same for my M-Audio sound card.
You can also see if Windows Update has drivers for your hardware.
Disable Ctrl-Alt-Del Requirement at Login
This one is entirely optional. If you prefer having to hit Ctrl-Alt-Del before you log in, then please ignore this step. For those of you who do not want to be bothered with it, follow these steps:
Go to Start -> Administrative Tools -> Local Security Policy.

In the window that spawns, expand Local Policies (on the left), click Security Options, and then double-click Interactive Login: Do not require CTRL+ALT+DEL.
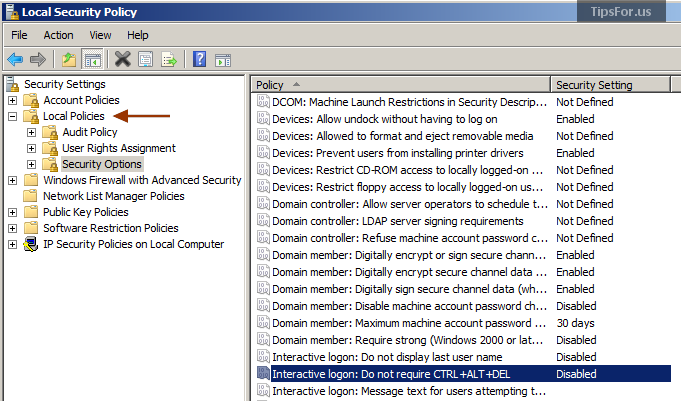
Switch it to Enabled.
Disable the Shutdown Event Tracker
Along the same lines, let’s remove another little annoyance when you shut down the computer. Since we’re using Server 2008 as a workstation, we have no need to track the purpose of every system reboot or shutdown.
Go to Start -> Run, and type gpedit.msc.

This will open the Group Policy Editor. On the left, expand Administrative Templates and click System. On the right, double-click Display Shutdown Event Tracker.
![]()
Switch it to Disabled.
Enable Wireless Networking Support
If you use wireless networking equipment, you will need to turn on support for it. If you don’t have any wireless equipment, you can safely skip this step.
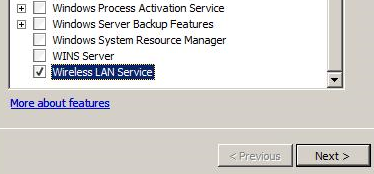
Fire up the Server Manager again (Start -> Server Manager), In the Features Summary section (near the bottom), click Add Features.

The Add Features Wizard will launch. Scroll to the bottom and turn on Wireless LAN Service.
Performance Options
By default, Windows Server 2008 prioritizes performance to best suit background services. Since this is now a workstation, let’s change it to focus priority on the programs you run.
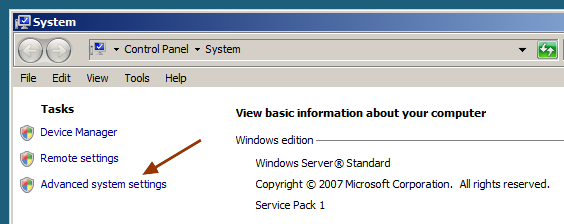
Go to Start, right-click on Computer, and click Properties. Or, just press the Windows key plus Pause/Break.
The System window will open. Click Advanced System Settings.
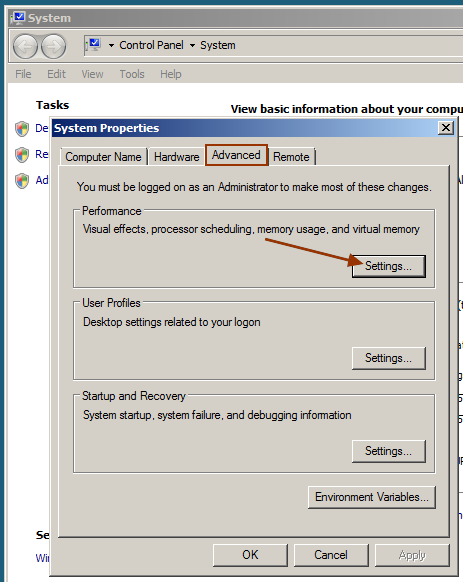
The System Properties window will open. Switch to the Advanced tab, and under the Performance section, click Settings.
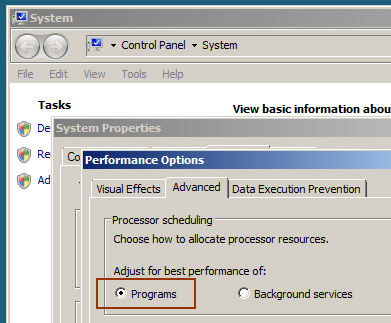
Switch to the Advanced tab, and adjust for best performance of Programs.
Enable Audio Support
What good is a workstation if you can’t play tunes, right? Let’s turn on the Windows Audio service. Go to Start -> Run, and type services.msc.
Scroll down until you find Windows Audio. Switch the startup type to Automatic.
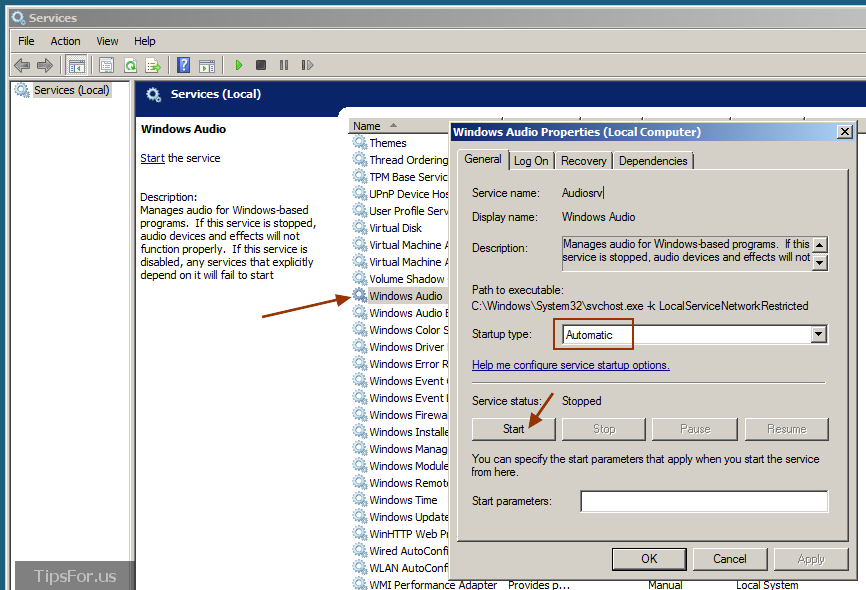
While you’re there, go ahead and Start the service.
Please note that you must have a proper audio driver installed for sound to work.
Turn On the Desktop Experience
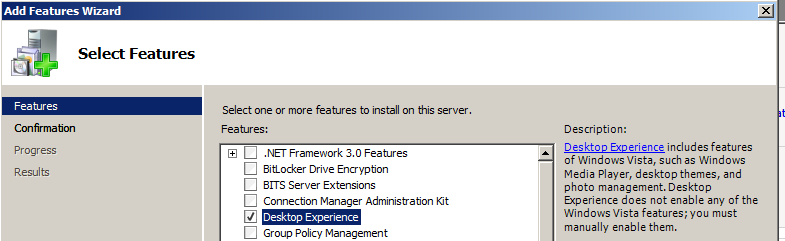
Now we’re getting to the fun part. If you want Server 2008 to look and feel like Vista, you must enable the Desktop Experience feature, which adds a number of amenities, including Aero, Windows Media Player, Themes, and photo management tools.
Launch Server Manager, go to Add Features, and select Desktop Experience.
You will have to reboot after the Desktop Experience feature finishes installing.
Enable Themes and Aero
Now that Desktop Experience is installed, let’s get Themes and Aero working. Go to Start -> Run, and type services.msc. Scroll down to the Themes service, and set the startup type to Automatic.

Also, go ahead and Start the service while you are there.
To enable Aero, you must first have a proper video driver installed. Then, just right-click anywhere on the Desktop and choose Personalize.
Click Theme, and from the drop-down list, choose the Windows Vista theme.
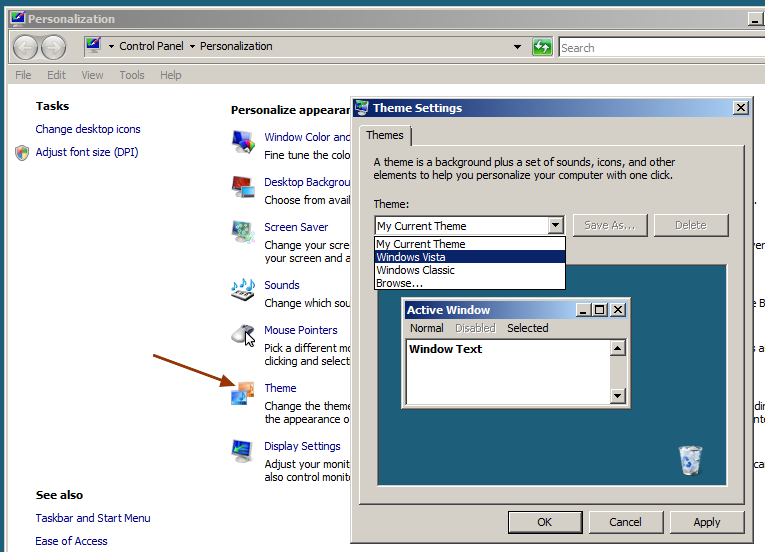
Voila! Your Server 2008 desktop should now look a little something like this:

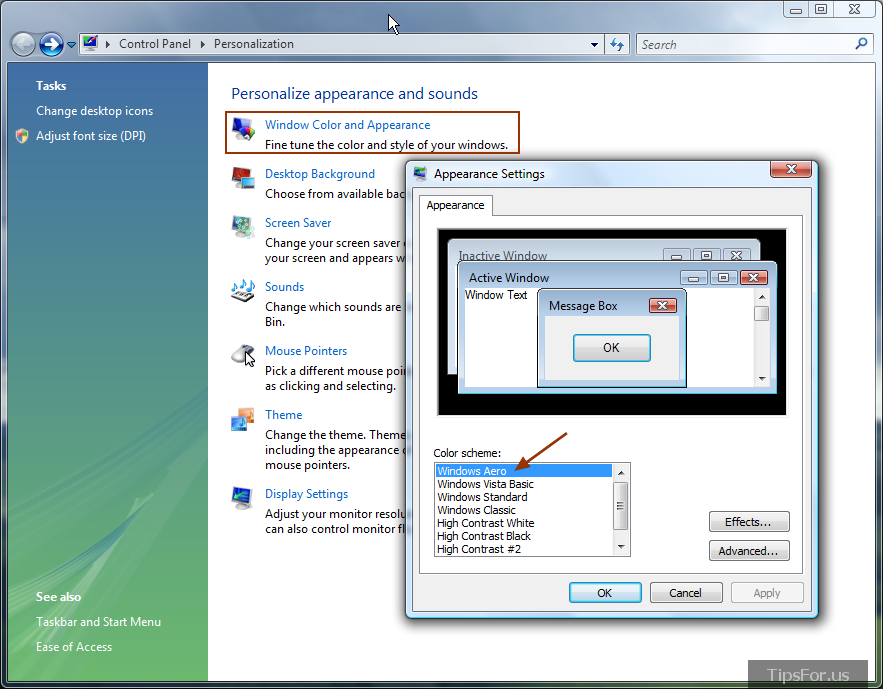
Finally, if your hardware supports Aero, make sure it’s enabled by going back to Personalize -> Window Color and Appearance. Under Color Scheme, choose Windows Aero if it’s available.
Get .NET 3.0
Some software requires the .NET 3.0 framework. To install it, fire up the Server Manager again and go to Add Features. Select .NET Framework 3.0 Features.
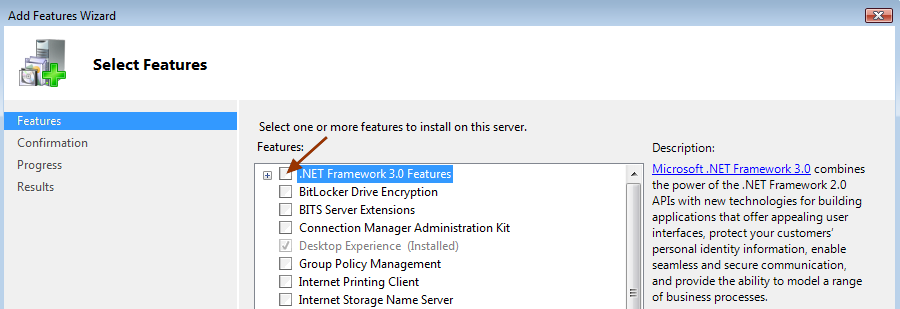
It will prompt you to install a couple of required role services as dependencies. Just follow the prompts to finish installing.
Turn on Windows Search
If you want to enable Windows Search (for searching through the content of your documents and Outlook e-mails), just follow these steps.
Open Server Manager. In the Roles Summary section, click Add Roles.

Click Next to move beyond the Before You Begin page. On the next page, choose File Services.

Continue following the prompts, then select the Windows Search Service. If you want, you may disable the File Server service at the top.
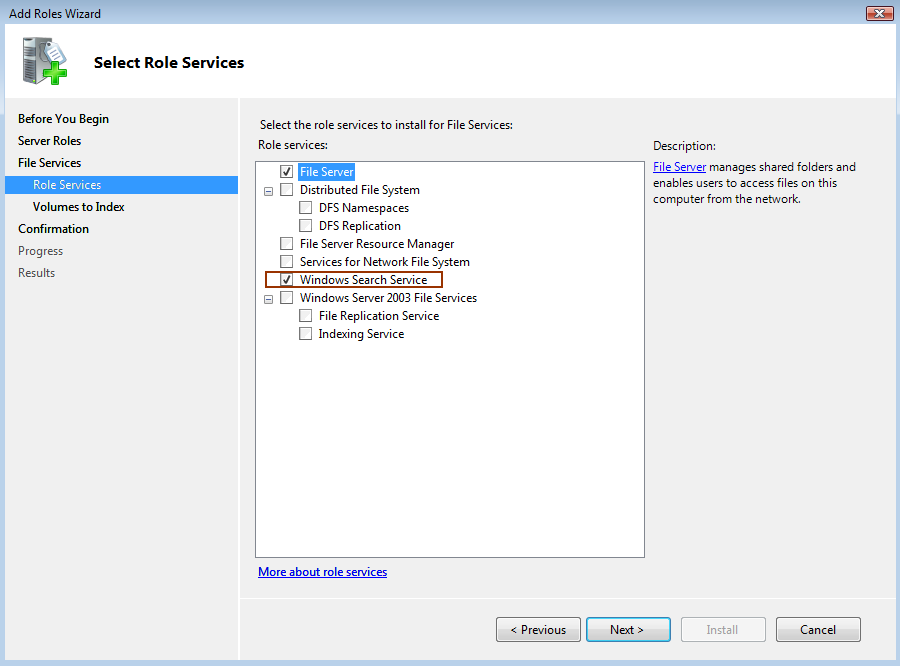
Select any volume that you wish to index, and finish installing.
Turn On SuperFetch
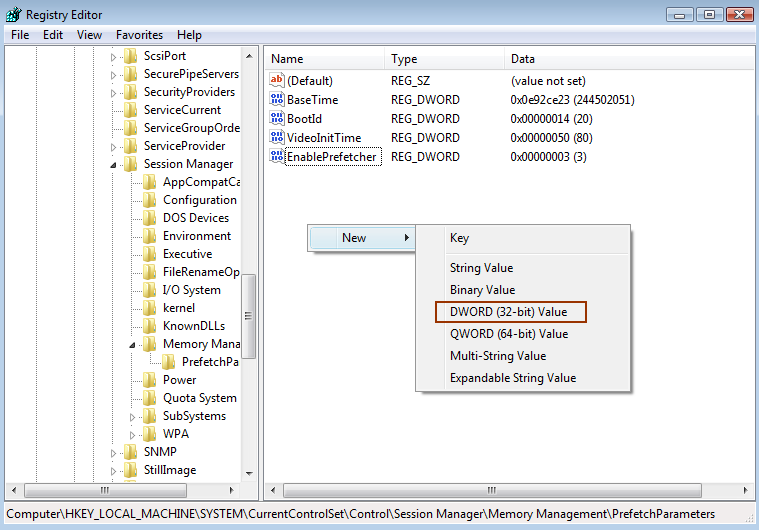
SuperFetch is disabled by default on Server 2008. Turning it on is supposed to make the OS more responsive as it learns your typical usage patterns and behavior. Before you can simply enable it, you must make a couple of registry changes. Go to Start -> Run, and type regedit.
Dig down in the hierarchy to the following path:
HKEY_LOCAL_MACHINE\SYSTEM\CurrentControlSet\Control\Session Manager\Memory Management\PrefetchParameters
Make these two changes:
Create a new DWORD Value named EnablePrefetcher and assign it a value of 3
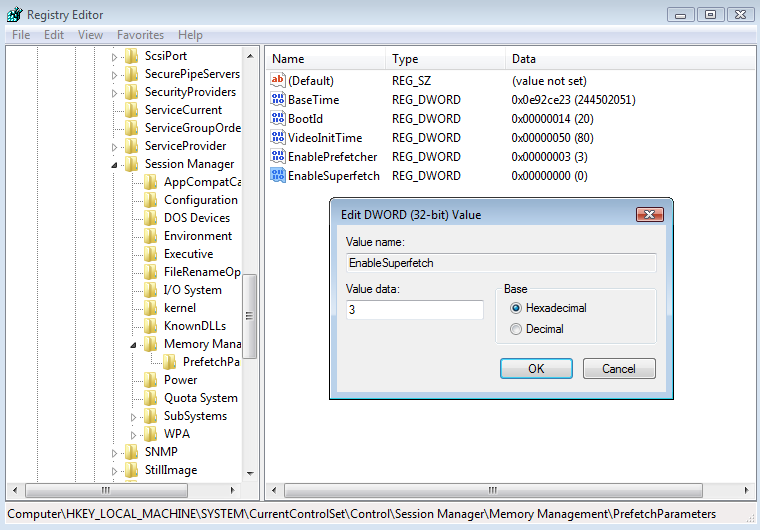
Create a new DWORD Value named EnableSuperfetch and assign it a value of 3
Hexadecimal values:
Now we just need to turn on the Superfetch service. Go to Start -> Run and type services.msc. Scroll down to Superfetch and set the startup type to Automatic.
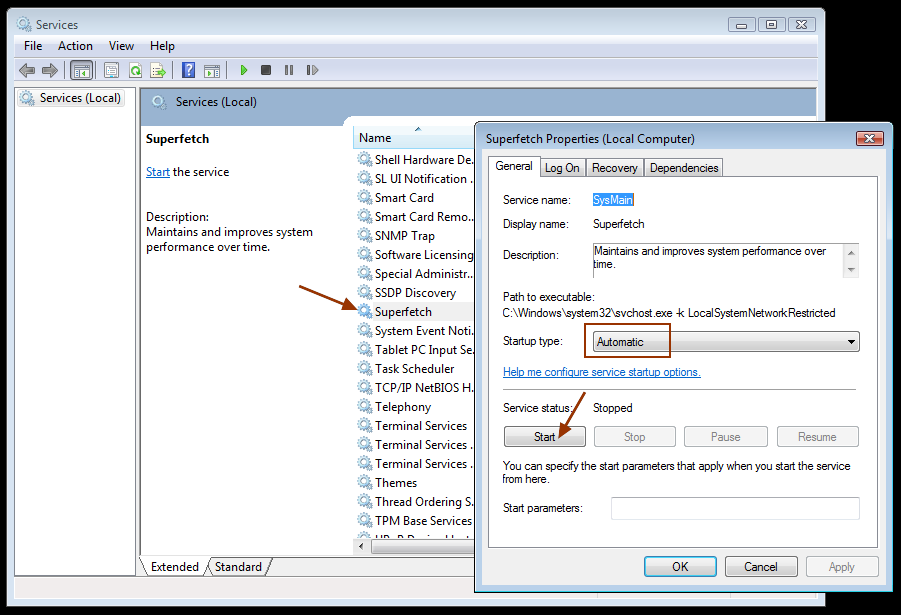
Also, go ahead and Start the service.
This concludes Part I – Basics. Stay tuned for further articles on configuring Windows Server 2008.