How-To: Create Screencasts on (nearly) Any Operating System
June 29, 2007 - Reading time: 12 minutes
Screencasts, or capturing a digital video of movement on your computer screen, are a great way to create tutorials, presentations, and even entertaining videos. Software used to create screencasts abounds for (nearly) every operating system, and ranges in price from free to upwards of $50.
As an example, here is a sample screencast (2.5 MB – Ogg Theora) showing the installation of Google Desktop for Linux. If you can’t open the video, please use VLC.
Naturally, I prefer the free options, but will give credit when credit is due if a paid option is simply better than a free option. That said, here is an overview of some of the screencast options available for Windows, Linux, and OS X, and possibly other operating systems.
Windows
Option 1: Wink
Price: FREE

Wink is a free screencasting program aimed at creating tutorials. As such, it offers a plethora of options in addition to simply recording the action on the screen. Some of the options include audio recording, inclusion of navigation buttons, adding text, and exporting to various formats, such as PDF, HTLF, and SWF. Wink also allows you to capture still screenshots, including the ability to capture screenshots based on the mouse and keyboard input.
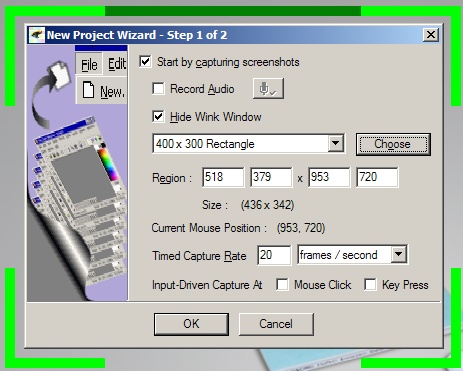
If you simply want to record the action on your screen, choose the designated section on your screen and press SHIFT + PAUSE to start/stop recording. When finished, you can render your video as a Flash movie.
Option 2: Camstudio
Price: FREE

Camstudio is free, open-source program that does one thing and does it well: capture action on your screen in a digital format. Ok, it can actually do a little more than that, but the learning curve for creating basic screencasts with Camstudio is practically non-existent.
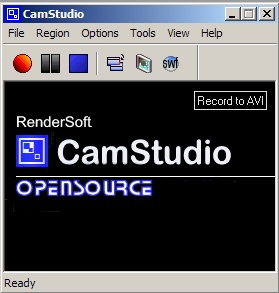
To begin using Camstudio, select your desired region, then press “Record.” Easy as pie. Camstudio creates AVI files by default, though you may choose the specific codec. Don’t forget to pick up the lossless codec on the Camstudio website – it creates large, but great-quality files. Using the included SWF Producer, you may easily convert your AVI files into Flash files. You may also add “screen annotations” – shapes and text boxes – to your video, increasing Camstudio’s usefulness as a tutorial creator.
I like Camstudio, but in the current version (2.0) there is a serious bug in which newly-created Flash files cannot be viewed in Firefox. Yikes! The issue is easy to fix (altering some values in the HTML source – see the Camstudio website for details), and should be corrected in the next version.
Linux
Linux users have many options for recording the action on the screen. Here are a few of them:
Option 1: Wink
Price: FREE
As described above, Wink is also available for Linux, though the version is currently stuck at 1.5. The Windows version is currently at 2.0. For simple screencasting, I think I would choose a different option on Linux.
Option 2: Istanbul (dead link)
Price: FREE
Istanbul is a simple screen recording program that outputs video as an Ogg Theora file. Using Istanbul is so easy that a drunken cockroach could use it. To start recording, click the big red icon. To stop, click the icon again. Got it? You can get fancy if you want by right-clicking the icon to choose options such as the particular icon or area to record.
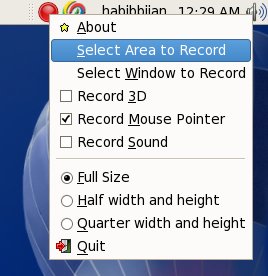
Istanbul works on GNOME, KDE, XFCE, and others. It’s probably available in your distro’s package repository. I’m using Fedora 7, and Istanbul is a simple yum install istanbul away.
Option 3: recordMyDesktop
Price: FREE
My personal favorite screen recording tool on Linux is recordMyDesktop. It exists in two parts: a command-line tool, and an associated GUI. Like Istanbul, both packages are probably already in your distro’s package repository. In Fedora 7, all you need is:
# yum install gtk-recordmydesktop
That will install both the command-line tool and the front-end. The command-line tool is a breeze to use: simply type recordmydesktop in the Terminal to start recording the full screen. To end recording, press Ctrl+C in the Terminal, and then check your home directory for a file called out.ogg. For (many) more options, see man recordmydesktop.
For you GUI lovers, here is what the main window looks like:
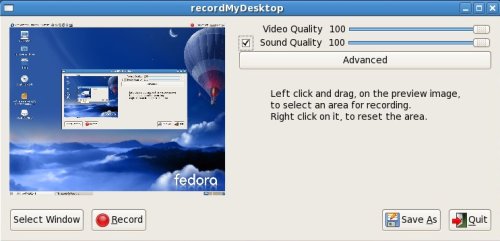
If you want to select an area or window for recording, you may easily do so on the preview image. Click the red button to start recording. I love the ability to pause during the recording. To do so, right-click the recordMyDesktop icon to make it look like this:  Right-click it again to resume recording. That’s it!
I was able to maintain pretty solid system performance using recordMyDesktop to capture a 1280×1024 screen on my humble AMD Athlon 2400+ with a gig of RAM. Here’s a link to the video (3.1 MB – Ogg Theora).
Mac OS X
Unfortunately, the free offerings available on OS X pale in comparison to the other operating systems. There are a number of screencasting programs available, but almost all of them cost upwards of $20. Most of them are also demos, and any “test” movies that you create will have huge watermarks on them.
UPDATE: You can use Quicktime on MacOS to record your desktop, all for free.
Option 1: Snapz Pro X (DEAD link)
Price: $69 (shareware)
![]()
If you have only heard of one screencasting program for OS X, I bet that it is Snapz Pro X. Despite the hefty price, it’s quite good at capturing screencasts, outputting the results as Quicktime movies. Here is a screenshot of the main window:
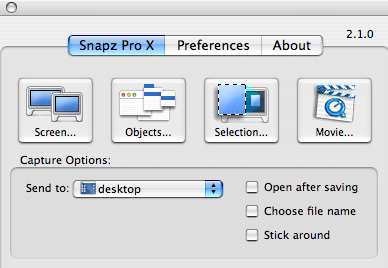
Because of its shareware license, videos created are not watermarked (unlike other programs such as iShowU). Like most shareware packages, there is a “nag” screen, which goes away if you purchase the product.
The current version (2.1.0) is a universal binary. I had no problems with it on my Macbook.
Option 2: Copernicus (DEAD link)
Price: FREE
 In a field dominated by commercial applications, Copernicus is a breath of freeware fresh air. For starters, it’s elegantly simple. Here is the main window:
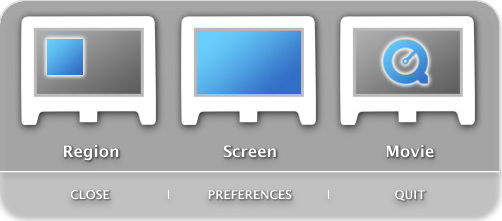
Ah, it’s beautiful. If you don’t like that theme, there are a number of others available, including one that mimics Snapz Pro X!
Copernicus offers the unique ability to record screencasts either to RAM or to the hard disk, the former offering the possibility of higher frame rates, and the latter allowing for longer videos.
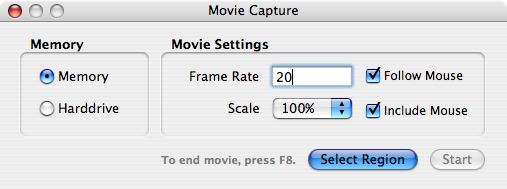
I wish I could say that Copernicus worked without flaw, but it only worked in creating rather short videos for me. Anything over about 10 seconds resulted in the application hanging. I don’t know if it’s just an issue with my Macbook or a greater bug within the program. Still, I welcome any free offering in the screencast category for OS X. Keep your eye on this one.
OS-independent (sort of)
Online option: Screencast-o-matic
Price: FREE
Here’s a unique idea – use your web browser to capture a screen recording without installing any software! Ok, I lied. You need to have Java installed and working with your browser, but most of you probably already do. Screencast-o-matic works on Windows, OS X, and Linux.
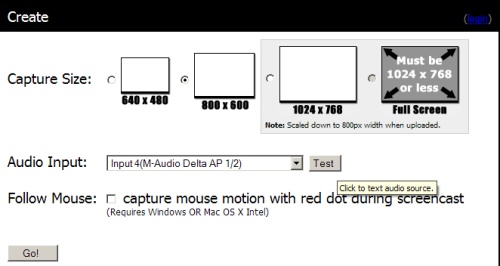
This is a novel idea, and it works, but the performance is limited when compared with a stand-alone application. I was only able to manage about 2 fps on my Macbook, making the resulting presentation rather “janky.” The online option is definitely intriguing, and works well for presentations that do not require higher fps. For instance, you would not want to use Screencast-o-matic to capture smooth footage from a 3D video game, unless you don’t mind it looking like a slide show.
There you have it: a number of ways to create screencasts from (nearly) ANY operating system. Do you have a favorite, preferably FREE program to capture screen recordings that I did not list? Let me know. We can all benefit from that knowledge.
If you enjoyed this article, please subscribe for future updates.