Create a Bootable Linux USB Flash Drive with UNetbootin
June 7, 2009 - Reading time: 7 minutes
With the rise of the Netbook, optical media (CDs/DVDs) may be marching toward eventual obsolescence. Even if optical media doesn’t disappear anytime soon, certain tasks such as creating a Linux-based boot disc are faster and more convenient when using a USB flash disk rather than a CD.
Let’s work on creating a Linux-based bootable flash disk. To do this, we will use the UNetbootin software.
UNetbootin – Main site
You will also need an empty USB flash drive, preferably 1 GB or larger. I’m using a 1 GB Lexar drive formatted as FAT32.
Boot Disk Creation
UNetbootin is available for Windows and Linux. We’ll use Windows for the purposes of this tutorial. First, you need to download and launch the program (it’s portable – no installation necessary).

Once it’s launched, you can either provide it with a Linux ISO that you have already downloaded, or pick a distribution from the list and let UNetbootin download the necessary files for you. Most popular distros are supported, including Ubuntu, Fedora, OpenSUSE, and Mandriva. You can also choose various system utilities such as FreeDOS, SystemRescueCD, Parted Magic, and the Dr. Web Antivirus Live CD.
I chose to use an ISO of Ubuntu 9.04 that I had already downloaded. All that’s left to do is make sure your flash disk is plugged in, choose it from the list, and click OK.
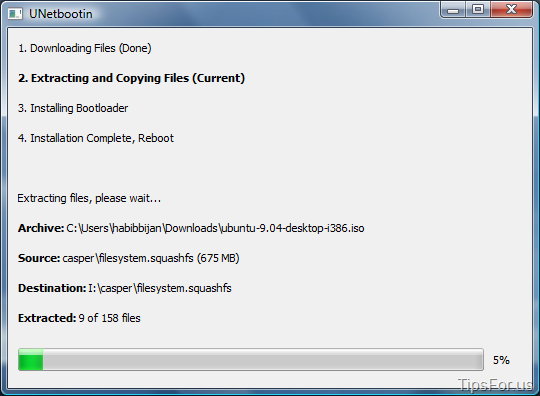
Away it goes! UNetbootin will gather the appropriate files, copy them to the flash disk, then automatically install a bootloader. This process may take several minutes to complete depending on the size of the distro. Ubuntu took about 7 minutes or so to complete on my machine, but I’m still using a single-core processor. Hey, it may be slow, but it does everything I need it to do.
When the process finishes, it will prompt you to reboot, which is entirely optional.
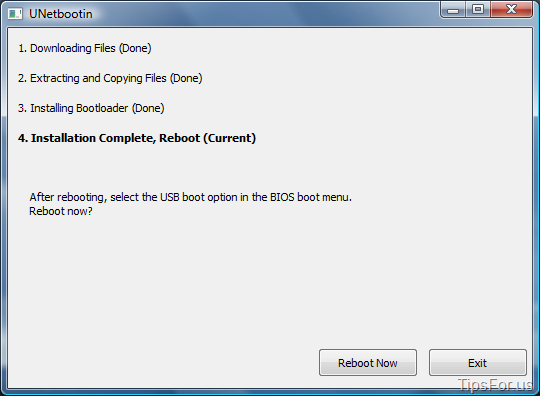
Hit Reboot Now if you want to go ahead and test your new boot disk on the machine you’re currently using. Otherwise, just exit.
Activate the Partition
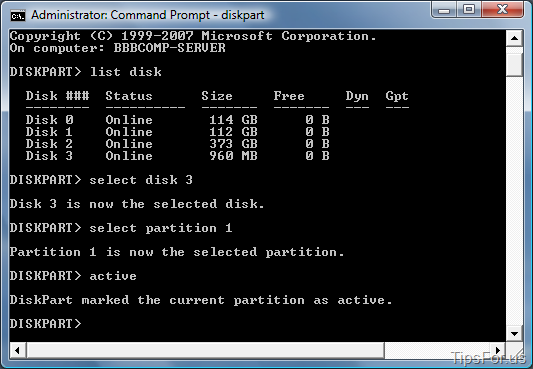
Chances are high that your new boot disk will just work, but if you get any strange boot errors, you may need to activate the partition. We can do that with the diskpart utility.
I’m using Server 2008 for this demonstration, but Vista should look and act the same way.
Launch a new Command Prompt (Vista – right-click and choose to Run as Administrator). Type:
diskpart
Now you should have a DISKPART prompt. We need to figure our the drive number for your flash disk. Type:
list disk
If you have several drives, just look at the size to determine which one is the USB flash drive. Mine is obviously Disk 3.
select disk 3
select partition 1
active
That’s it. You’re finished. By typing the active command, you have specified the current disk and partition as active. You can type exit to quit.
Booting From the Disk
With the USB flash disk plugged in, go ahead and reboot the computer. This next step is different on many machines, but right as the computer first boots, look for a keystroke to choose a boot device. The key for my motherboard is F8, but it may be F11, F12, or some other key entirely on yours.
Once you find the right key, you should get a menu that allows you to choose a disk or drive from which to boot.

Here I have chosen my Lexar USB flash disk from the boot menu. Provided it boots normally, you should get a UNetbootin bootloader like this:
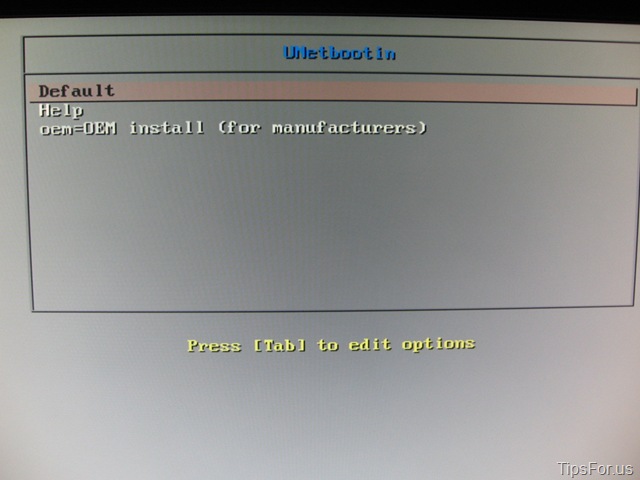
Choose the Default option to start booting, and the rest should function just like a typical live CD. Here’s Ubuntu booting from my USB drive:

Once nice part about using flash media as a live environment is that individual programs are far more snappy than when running from a CD. For instance, OpenOffice loads from my flash drive in under 10 seconds. Launching OpenOffice from a live CD might take minutes!
One last thing: remember that the distros that UNetbootin creates are substitutes for CD boot discs, not fully installed Linux operating systems. In other words, they are not persistent – any data that you create or modify will be lost the next time you reboot (just like when working with a normal live CD). Keep that in mind as a limitation. There ARE exceptions, like Puppy Linux, which lets you save your data directly to the USB flash drive.
Happy booting!