Add Gmail IMAP to Thunderbird Without Breaking a Sweat
December 11, 2008 - Reading time: 3 minutes
![]() As you may know, Gmail IMAP and Thunderbird form an awesome combination. As you may also know, setting up and configuring that combo is a time-consuming process. First you have to look up and enter all the required port information. Then you have to look up and follow the IMAP recommended client settings for things like sent folders, drafts, junk, and trash. It’s a hassle, but the end result is worth it.
As you may know, Gmail IMAP and Thunderbird form an awesome combination. As you may also know, setting up and configuring that combo is a time-consuming process. First you have to look up and enter all the required port information. Then you have to look up and follow the IMAP recommended client settings for things like sent folders, drafts, junk, and trash. It’s a hassle, but the end result is worth it.
While I don’t object to anyone going through that process manually for the hands on experience, I’d love a way to do it in seconds rather than minutes. I’m reminded of one of my favorite Garfield quotes – You can bet it wasn’t an exercise freak who invented power steering.
Alas, there IS an easier way. just use the Gmail IMAP Account Setup add-on for Thunderbird. When you install this extension, it adds a couple extra entries to the account setup wizard that will automatically configure recommended settings for IMAP Gmail. Nice!
Here’s the simple, sweat-free process:
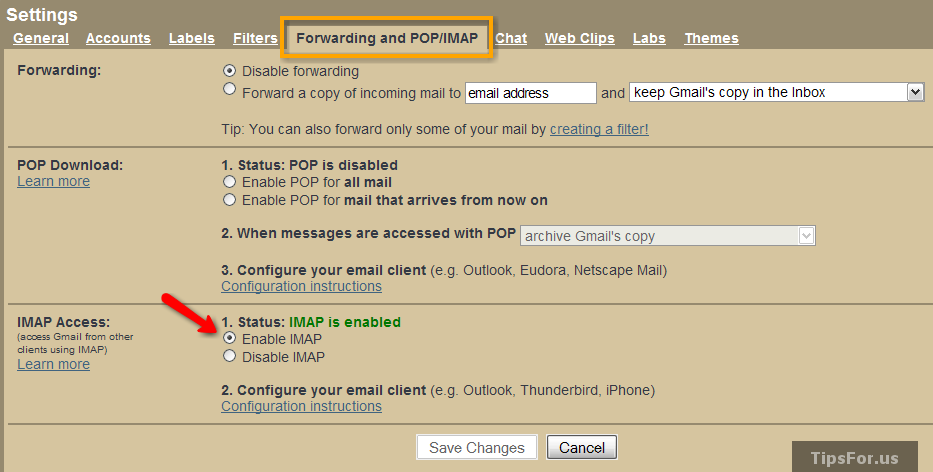
First, be sure that you have enabled IMAP in Gmail. Go to the Settings page and click Forwarding and POP/IMAP. Near the bottom, enable IMAP.
Download the Add-on XPI file from the Thunderbird Add-ons page. Now open Thunderbird and go to Tools -> Add-ons. Click the Install button.
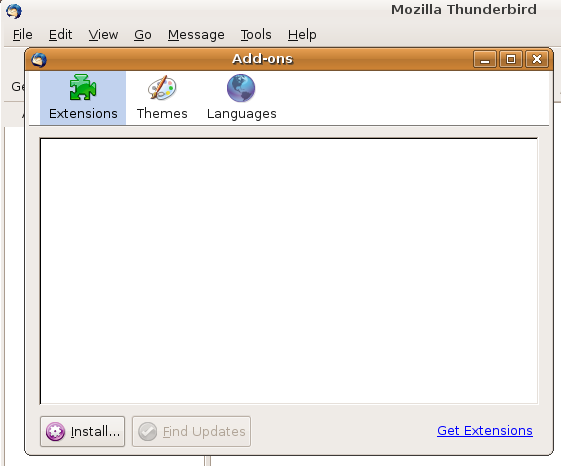
Browse to find the XPI file that you downloaded and install it. Restart Thunderbird to finish installation.
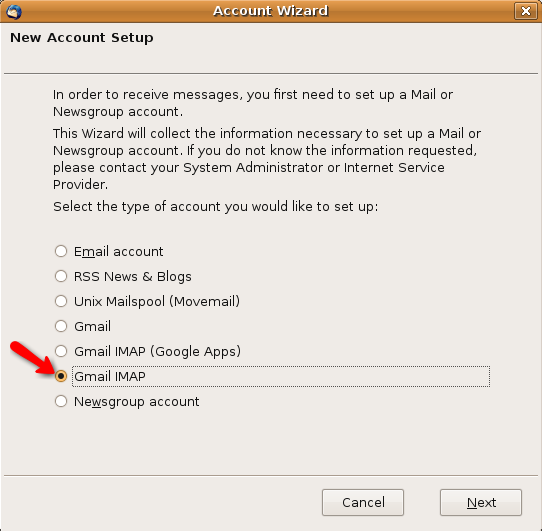
Now, when you create an new account in Thunderbird, the New Account Setup Wizard has a couple new options.
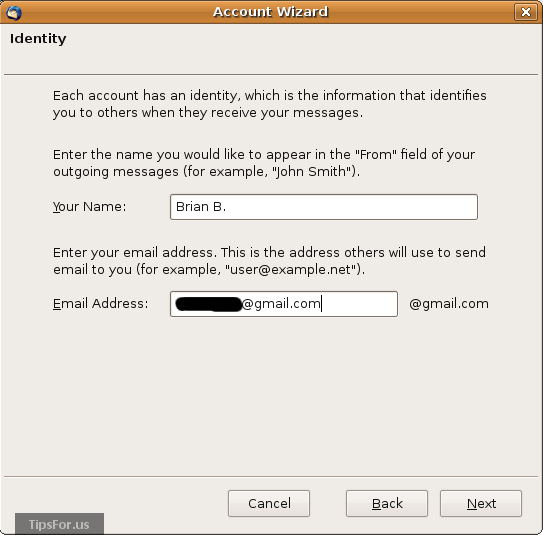
Next, just add your Name and E-mail address.
And that’s it! The last page of the wizard will simply display your setup information, including SMTP.
That was easy, wasn’t it? No more fooling around with ports and managing folders. I’ve tested Gmail IMAP Account Setup on Windows and Linux, though I assume it also works on Mac OS X.