VirtualBox Walkthrough – Easily Run Other Operating Systems Virtually
November 20, 2008 - Reading time: 8 minutes
![]() In the land of virtual machines, there are a few big names, such as VMware and VirtualPC. However, there is a slightly lesser-known contender worth examining – VirtualBox.
In the land of virtual machines, there are a few big names, such as VMware and VirtualPC. However, there is a slightly lesser-known contender worth examining – VirtualBox.
I have no intention of pitting the various virtualization tools head-to-head, or to label any one of them as the subjective best, but if all you’re looking for is a free and easy way to run virtual copies of operating systems, VirtualBox has you covered.
VirtualBox runs on Windows, Mac OS X, Linux, and OpenSolaris, and can support a massive number of guest operating systems. DOS? Check! OS/2? Yep! Vista? Of course.
Best of all, VirtualBox is completely free. You can choose to download either a compiled binary or the open-source edition.
Walkthrough
I’m going to walk through the process of setting up a new virtual machine. The host OS is Mac OS X, using VirtualBox 2.0.4.
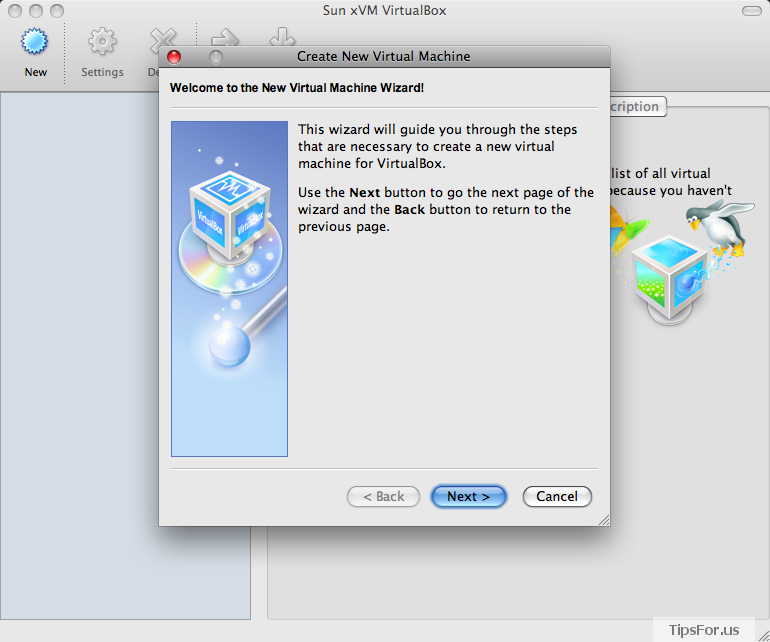
Once you install and launch VirtualBox, it’s time to create a new virtual machine. Click the New button in the top-left corner.
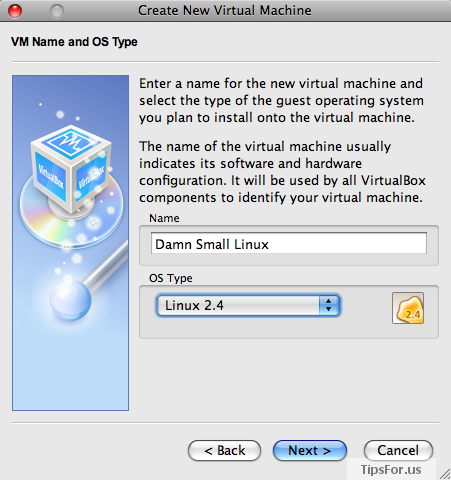
Next, choose a name for your virtual machine and select the appropriate guest OS type. In my case, I’m planning to install Damn Small Linux, which uses a Linux 2.4 kernel.
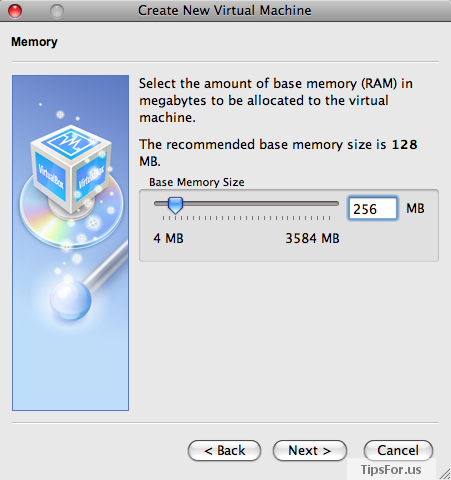
In the next step, select the amount of system RAM that you wish the guest OS to use. You can always adjust this later, and the amount to choose largely depends on the type of guest OS. I have 1.25 GB available in my Macbook, but Damn Small Linux only needs a little bit. I’ll be generous and give it 256 MB.
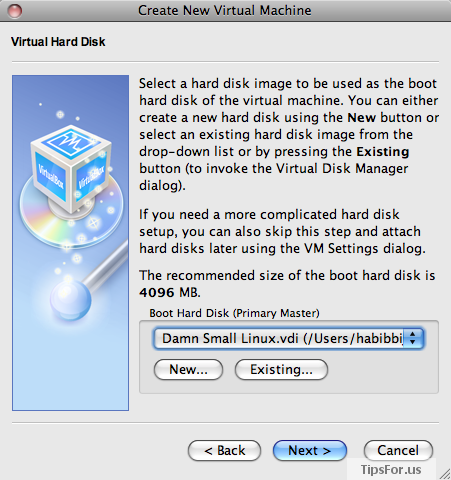
Now it’s time to create a virtual hard drive for the guest OS. After all, it has to install somewhere, and a virtual hard disk ensures that the new installation does not somehow trash your existing hard drive! Click the New button to launch the New Virtual Disk Wizard.
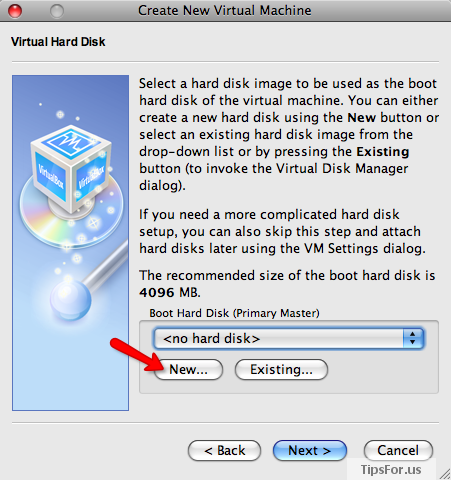
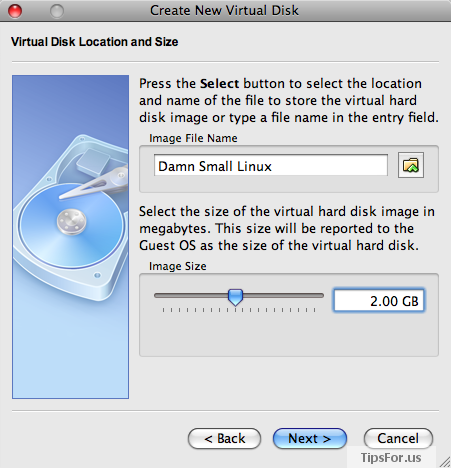
Create a name and choose a size for the new virtual drive. You have a choice here with regard to the size of the virtual disk:
- Dynamically expanding image
- Fixed-size image
If you choose option 1, the size that you specify for the disk is the maximum potential size. The disk will actually consume only as much space as is needed, and will grow larger automatically until it hits the maximum. The benefit here is in reduced file size on your real hard disk.
If you choose option 2, VirtualBox will go ahead and allocate the entire specified space for the disk. The benefit here is in slightly better performance of the virtual machine, at the expense of a larger file size now. It’s a trade off. If you can spare the disk space, I suggest choosing the fixed-size option.
Once you have chosen the type of disk image, go ahead and type a name for the disk. You can use the slider to manipulate the disk size.
Created your virtual disk yet? Great, let’s continue with the installation.
Alright, now that you have completed the wizard, VirtualBox will show you the details of your soon-to-be-running virtual machine. Before you get excited and hit the Start button, let’s take a look at a few more details.
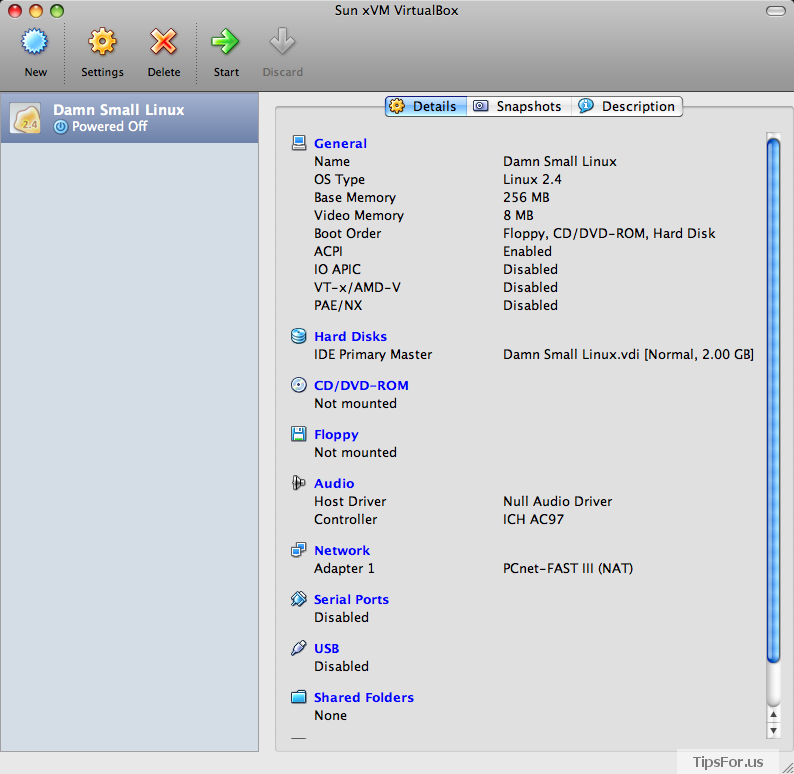
Click the Settings button in the top-right corner. Here, we can adjust settings for the new virtual machine, including networking, USB, and access to the CD/DVD-ROM. Feel free to edit any parameters that you like. You can always adjust them later.
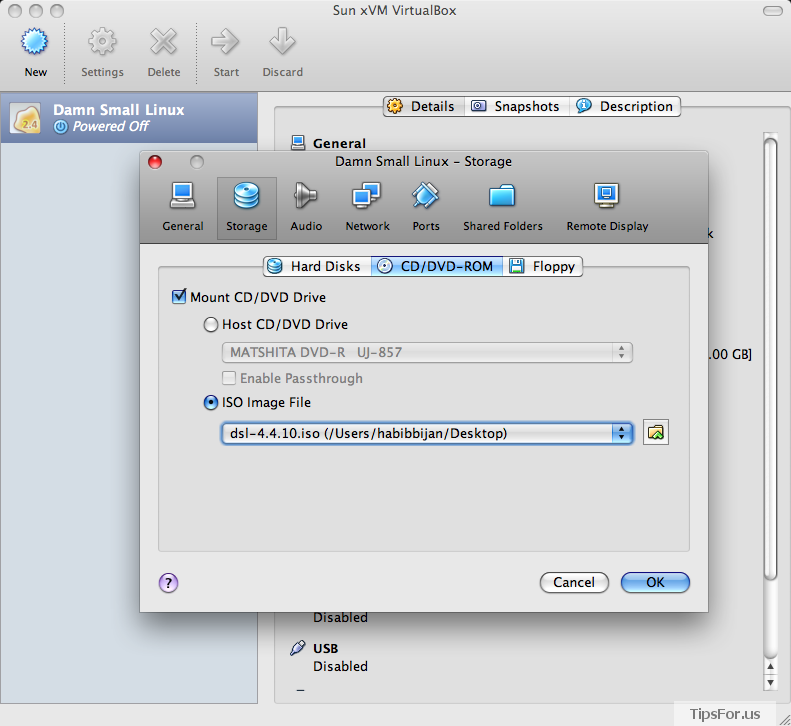
You will almost certainly have to adjust the CD/DVD-ROM settings. In my case, I have an ISO that I want to boot, so I’m going to choose that option and select the location of my Damn Small Linux ISO.
Another option you may want to explore is setting up Shared Folders. In essence, you can use these to allow file transfers between the host and guest operating systems.
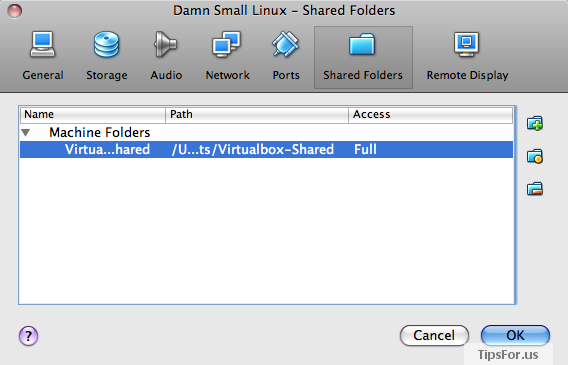
Hint: Don’t put any spaces in the shared folder name. Also, you will need to install the VirtualBox Guest Additions on the guest OS before you can access shared folders. Guest Additions can be installed once the virtual OS is running.
Are you ready to get this guest OS running? Once you’ve adjusted all the settings that you like, hit the big, green Start button at the top. Your guest OS should launch and start the booting process.
Here, Damn Small Linux is starting to boot:

And here, Damn Small Linux is running in its full glory on my Macbook. Click to enlarge.

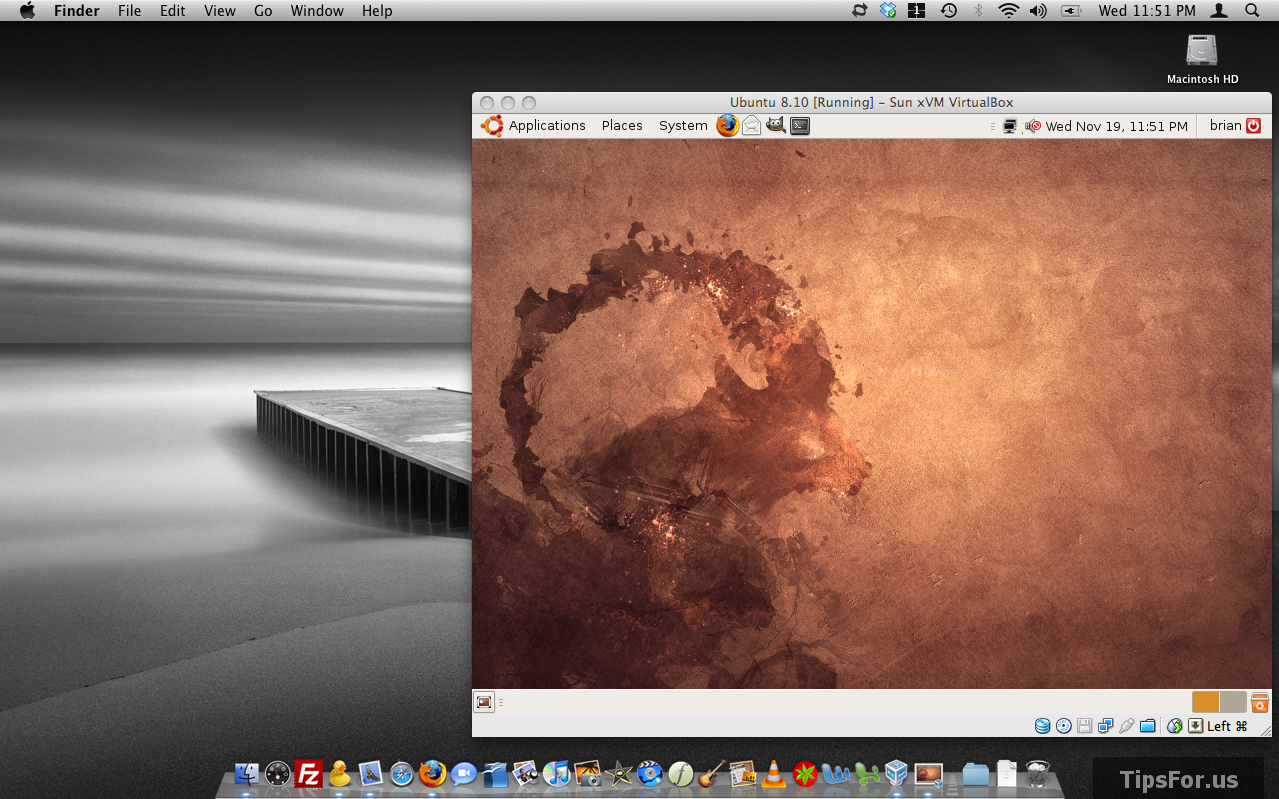
And just for kicks, here’s a screenshot of Ubuntu 8.10 running as a guest OS on my Macbook. Click to enlarge.
And this concludes our installation walkthrough. If your guest OS supports it, I strongly recommend installing the VirtualBox Guest Additions. Benefits include, better video support, mouse pointer integration, time syncronization, and access to shared folders. To install Guest Additions, take a look under the Devices menu.
One of my favorite features of VirtualBox is the ability to create multiple snapshots of the guest OS. This is useful for purposes of software testing or tweaking. Oops! Make a terrible mistake? Just revert to a previous snapsot and the guest OS will be restored to a previous state. Nice!
Happy virtualizing!